The measurement method of the beating 6 is: using a dial gauge to measure at least three equidistant teeth, the reading shall not be greater than 0.08 mm.
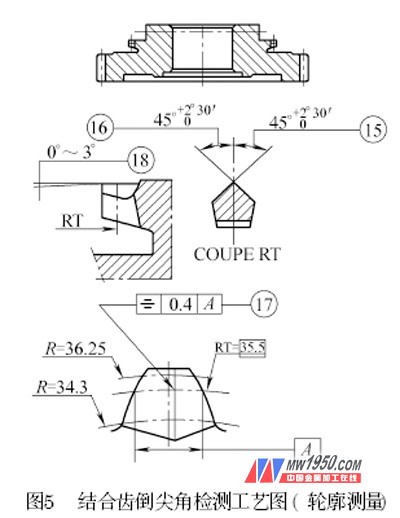
5OP60 combined with the tipping angle of the tooth, the item detected by the profilometer is as shown in the test process diagram 5. The main test items are as follows: 15 right tooth surface and RT two sides and half angle, 16 left tooth surface and RT two sides and half angle, 17RT front ridge line symmetry / tooth Thick, 18R1 and R2 front teeth edge straightness.
The above four test items are measured with a profiler, and a special bracket is used to simulate the angle reference and the index circle diameter.
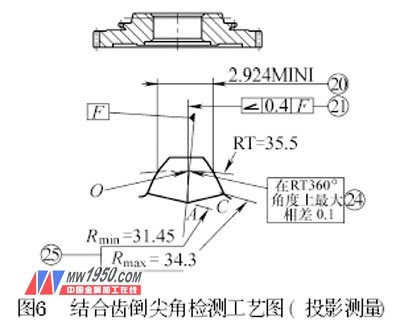
OP60 combined with the tipping angle of the tooth, the detection items detected by the projector are shown in Figure 6. The main test items are as follows: 20-degree circular tooth width minimum 2. 924 mm, 21 front tooth pitch angle, 24 deviation, 25 tooth surface combined with ridge limit.
The above four test items are measured by a projector, and a special bracket is also required for simulating the angle reference and the index circle diameter. The projector used in this process measurement is completely different from the traditional projector measurement principle. It uses image measurement technology, which uses the image of the object to be measured as a carrier of information, and extracts useful information from it for measurement purposes. Image measurement methods have the advantages of non-contact, high speed, large dynamic range, and rich information.


Note: The F:F axis passes through the O point and the center of the part O:RT and the front tooth edge
Previous page next page