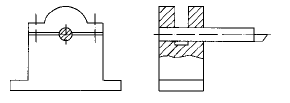
Figure 1 Thin wall sleeve |
The processing of thin-walled deep-hole parts is difficult, especially the processing of high-precision sleeves is more difficult. Our company has a sleeve part as shown in Figure 1. The design requirements are strict, the processing precision is high, and the early stage of product development is processed by external processing. There are many problems, which can not meet the needs of normal operation of the product. The company decided to make it. 1 Process analysis The sleeve is a high-speed rotating part with a maximum speed of nearly 20,000r/min. The design requires extremely strict dynamic balance and the dynamic balance level is G1. The smaller the coaxiality between the outer circle and each stepped hole, the better, preferably within 0.01. The part number is an integral structure, the stepped hole is a deep hole, the deepest hole is nearly 900 mm, and the aspect ratio is close to 13 mm. In the deep hole cutting, the vibration, the difficulty of the knife and the chip removal, and the difficulty in heat dissipation make the processing difficult, and it is also difficult to measure the coaxiality of the deep hole, the deep hole and the outer circle. Due to the overall structure, the rough material is round steel, and the weight of the blank before processing is 127kg. After processing, only 20kg is left, which is less than one sixth of the original weight. A large amount of metal is cut off, so the deformation is severe. 2 Process measures In response to the above problems, when formulating the processing technology, the following measures are taken. Multiple heat treatments are used to eliminate machining stress and deformation. - For the alternating hot and cold processing, the scientific calculation of the process rationally arranges the process margin, so that each process has a margin, and the margin is too large to prevent new stress deformation.
- Deep hole coarse semi-finishing, using our company's more mature rear guide reaming, the hole layer is enlarged and layered. Guided reaming overcomes the vibration of deep hole machining and the deflection of the center of the hole. The guiding reaming knife is shown in Figure 2.

Figure 2 Guide hole reaming knife | 
Figure 3 knife holder | 
Figure 4 shock absorbing shank | 
Figure 5 Lathe alignment method |
- The deep hole guide hole reaming only solves the rough semi-finishing of the hole. To ensure the success of the part number, it is necessary to solve the fine grinding of each step hole. The reference for machining deep holes is the outer circle, and the reference for machining the outer circle is the center hole. Considering that the orifice is large in the preparation process, it is not easy to ensure the roundness of the orifice, so it is necessary to insert the bulkhead multiple times. The rear end of the rough car is equipped with a stuffy head, and the outer hole is coarsely ground with the center hole of the bulkhead. Then the semi-finished hole is semi-finished, and the semi-finished hole is equipped with a bulkhead, and then the outer circle is semi-finished. After the aging, the outer head is finely ground and finally finished. Fine car holes, fine grinding holes.
- The biggest problem in deep hole turning is vibration, which is the key to the processing of thin-walled deep-hole sleeves. The following measures are taken for the preparation of the process.
- The special tool holder makes the shank of the deep hole tool into a cylindrical shape, and the special tool holder is used to fix the shank on the middle carriage of the lathe, which can greatly improve the rigidity of the tool (see Fig. 3).
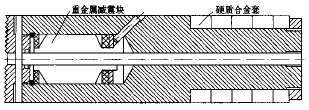
- The vibration-damping arbor of the anti-vibration structure is specially designed when the damper is used to fine-tune the boring hole (see Figure 4).
- In order to prevent the friction between the outer circle of the workpiece and the center frame when using the rolling center frame, the center frame of the precision rolling bearing should be used. When the hole is finished, the coolant should be sufficient to prevent the workpiece from heating and causing new deformation.
- Reasonable selection of tool geometry parameters Use a small arc radius indexable insert with a 90° lead angle to minimize the backing force.
- Reasonable selection of cutting amount According to the cutting amount, the indexable insert can select the groove shape with good chip breaking performance to ensure smooth cutting of deep hole cutting.
- The selection of high-precision CNC lathe requires that the radial axial runout of the CNC lathe is small, the straightness of the guide rail is good, and the earthquake resistance is good.
- Deep hole grinding
- The f d hole is a matching hole, which has high precision and low roughness. We use a deep-hole grinding machine with a long grinding head to ensure dimensional accuracy and roughness.
- Deep hole measurement
- The deep hole size without tolerance requirements is measured by the extension gauge of the inner diameter of the measuring rod.
- The deep hole size with tolerance requirements is measured with a pneumatic gauge with a long measuring rod.
- There are three methods for measuring the coaxiality of the outer circle and the hole: three-coordinate measurement method; the lathe is used to measure the outer circle measurement hole jump measurement method (see Fig. 5); and the V-shaped iron linear guide micrometer measurement method.
After several attempts to improve the process, the thin-wall deep-hole high-precision sleeve processing was successful. After the test run to meet the design requirements. |


